Thank you once again everybody for the advice on how to adjust a derailleur. I am pleased to announce, that with your help, it is done. To recap the problem I was having: When downshifting to the lowest gear, there was nothing stopping the chain from going past it and slipping off the cog. Here is how we corrected this:
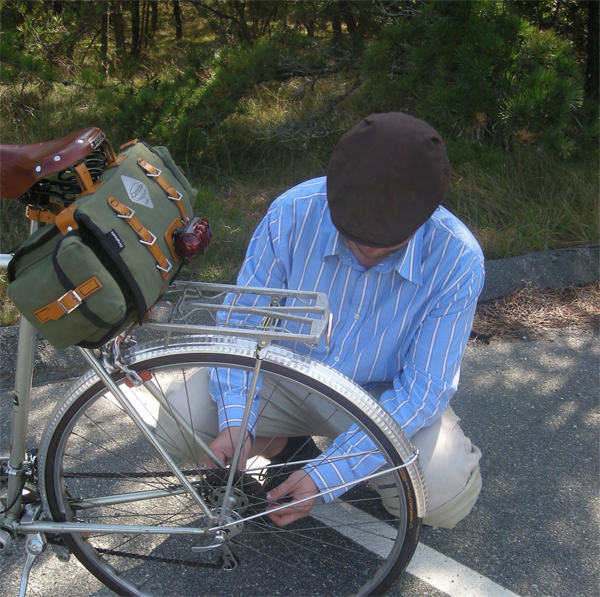 Mechanic
 Assistant Mechanic
 The all-important tool
 The derailleur. This is a rear SunTour Vx derailleur from the late 1970s. Note the two screws on the left.
 A side view of the screws.
 And here they are close up. Notice the letters "L" and "H" next to the screws. The "L" indicates low gear (the largest cog). The "H" indicates high gear (smallest cog). To stop the chain from going past the largest cog when downshifting into the lowest gear, tighten the "L" screw.
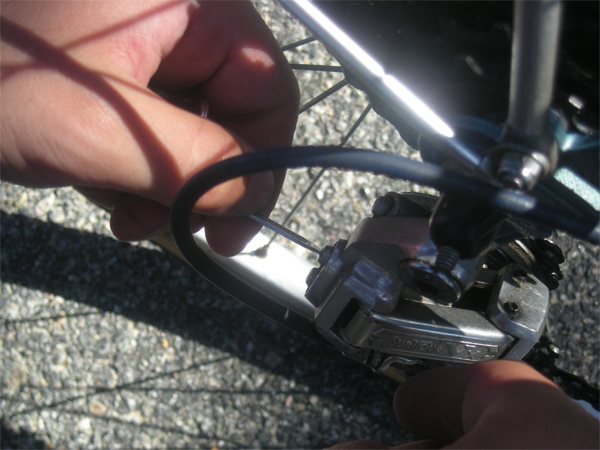 Here is the screw, being tightened. Conversely, if you find that the chain does not travel sufficiently to reach the largest cog when shifting to your lowest gear, you need to loosen this screw a bit. And if you are having this problem when upshifting to the highest gear, simply do the same thing to the "H" screw.
 A close-up of the procedure. This takes very little time.
 After the adjustment, test the derailleur: first by manually spinning the pedals as you shift, then by test-riding the bike.
 Here I am, having happily shifted into the lowest gear without the chain coming off.
 All done, and ready for the steepest hills. A big Thank You again to dukiebiddle, cyclemaniac, somervillain, and all the others who kindly offered advice and posted links. Your support is very much appreciated.
Some classic derailleur adjustment instructions, using more conventional tools:
. Sheldon Brown's thorough article on "derailler" adjustment
. The Bicycle Tutor's instructions and video
skip to main |
skip to sidebar
Blog Archive
-
▼
2009
(1637)
-
▼
September
(196)
- Dateline Copenhagen
- Unhappiness/Practical and Quixotic Pursuits
- Nike Brings Back Michael Vick
- Captain of 1980 USA Hockey Team Interview from 2006
- New CSPO-CATF Report on Goverment Role in Energy I...
- Has Steve McIntyre Found Something Really Important?
- Derailleur Adjustment: an Illustrated Guide
- SOC
- Polanski
- 2009 Olympic Congress
- All Eyes on Copenhagen
- Do you Understand my Language
- The $500,000 Diet Seems to Work: Glen "Big Baby" D...
- Resolve: Father/Son Jersey Night
- Ett par Coach-filmer
- Sports Law Blog Bowl II: Toledo 41, FIU 31
- Provincetown Cycle Yum
- Politics Trumping Policy in the U.S. Emissions Bill
- Going without breakfast and coffee is a bad idea. ...
- To Go or Not to Go....
- UP
- Climate Policy Can Decrease Tropical Cyclone Disas...
- Its George W. Bush's Fault
- Måndag-träning
- Amicus Briefs filed in American Needle v. NFL
- Of Hills and Vintage Gear Shifters
- Quote of the Day: John Kerry on Not Cap and Trade
- Krugman Confuses Ends and Means
- Lomborg is All Over the Place
- How to Get Shit Done
- Defining sport: An illustration
- Google Trends
- To the Lighthouse
- No title
- The Debate Over Commercial Use of College Players'...
- Bad Ideas Never Die
- Random Thoughts on Various Subjects
- Robert Reich on the "Recovery"
- The aim of public education is not to spread enlig...
- Follow Up on Alan Carlin: Kudos to EPA
- No title
- Aquatic Bicycle
- President Obama Plays Down Copenhagen
- Rybinsk 24kg Virtual Competition (with vids now)
- The All Whites New Zealand's National Football Team
- Why PETA Shouldn't Blame Roger Goodell for Michael...
- David Keith on Air Capture
- Obama's "Plan B" on Climate
- Nicholas Stern's "New" Climate Policy
- Everyone Who Disagrees with My Politics is a Denier
- Friday is a dreaded day for workaholics. We dont s...
- TGIF
- French Inspirations: Beautiful Oddities
- Sue Bradford Quits
- MS FB Team Goes Beyond
- Cracks in the Wall?
- Case Study in How to Use Your Position as a Report...
- Use of College Players' Identities in the Sale of ...
- Akihiro Sawa on Japan's 25% Emissions Reduction Ta...
- Joe Romm: Lukewarmer
- The children have no future. The government has sp...
- Van is Gone
- Replication of Pielke (2007)
- New Peer-Reviewed Paper on Japan's Climate Policy
- That Tricky Business of National Sovereignty
- Unexpected Sightings
- Take Justice Sotomayor Out
- Dont be mislead. Daily blogging is a real challenge.
- Is China's Energy Intensity Story A Myth?
- More on American Needle
- A great tradition - staying in contact
- Japan: We've Got a Strong Goal, But Not a Clue How...
- Incoherence Continues on Adaptation
- Lomborg's Economists' Missed Opportunity
- The consequence of healthy eating is three dumps p...
- Petitioner's Brief in American Needle Now Available
- HS Linebacker Interview
- Fm, em och Brettzel via Tommy
- Aquamarine
- Unwarranted Credulity in the FT
- Much Ado About Very Little
- NZ Sports Journalists: Corruption or Incompetence
- Head football coach note to staff
- Danish Climate Host Tells India, China: Too Bad Fo...
- Jevons Paradox Illustrated
- Why Atheists Become Leftards
- San Barbados has taken a tumble ...
- The Heart of a Frame
- Goodbye Fairfax Forever
- Random Thoughts on Various Subjects
- The Tax Consequences of the Chicago Cubs Sale
- Fuji "Vent Léger": a Vintage Mystery
- I Swear, If Tomorrow Never Comes is a Country Song
- NBA Locks Out Referees
- This Won't Play in Peoria
- If Nostradamus could really see the future, why di...
- Who Is Afraid of Railroad Tracks?
- More Cowbell . . . .
- Time for a "Plan B"?
- One day, I might follow the splendid advice I give...
- How Not to Build Trust
- Dad of the Year
- When White Leftards Pull the Black Race Card
- News That Myles Brand Has Passed Away
- An Ode to My Gloves
- Opening Brief in American Needle v. NFL Set for Fr...
- There are those who accept responsibility and thos...
- US-Europe Climate Rift?
- Joe Romm Flip Flops Again
- Cap and Trade Delayed?
- Are You a Climate Skeptic?!
- Coaches teaching civ pro
- Plot of Seinfeld Reunion Released
- Stöt
- Native Americans File for Cert in Their Challenge ...
- How To Increase Blog Traffic and Make Killer Money
- The world has stopped being my bitch. I have lost ...
- Dubious Statistics
- Family Guy is Back
- Cycling Through the Neighborhood(s)
- Why You Should Never Attend High School Reunions
- Beyond GDP?
- Taylor Swift Wins VMA
- No, not Beerfest .. Orangefest instead!
- LCCJ 2x24kg x 40
- A Real Classic: Vintage Gazelle
- Children and Religion/ The Issue of Tolerance
- One of these days . . .
-
▼
September
(196)
Popular Posts
-
After a little over a week since 48 players exchanged numbers with their teams, and according to my research 13 players have signed if you i...
-
This is my opening post on my blog. This blog is going to be about the Media/ Sports/Music/Politicans. I hope ya'all find it interestin...
-
 I am going ahead with the idea of facilitating barter exchanges between readers, chosing the old-school method in the interest of simplicit...
 -
 Male porn stars are famous for their above average endowments. Ron Jeremy is measured at 9.75 inches. Another famous porn star was John Holm...
 -
 I take what I call a journalistic interest in a variety of sports. If I didn't write, I wouldn't waste my time learning about them. ...
 -
 Paula Radcliffe is a distance runner who hails from Britain. She is the first woman to ever go below 2:20 for the marathon redefining what w...
 -
Today's FT has a special report on Nigeria, and has a very interesting discussion of energy access : Despite average cash injections of...
-
Just wanted to thank everyone who has been apart, visited or entered our contests on this blog and help us get to 30,000. It's not quite...


Copyright © 2011 Sport News Update | Powered by Blogger
Design by Free WordPress Themes | Bloggerized by Lasantha - Premium Blogger Themes | Website Value Calculation Tool
0 comments:
Post a Comment