Showing posts with label vintage. Show all posts

Friday, December 21, 2012

Alenax: the Ultimate Vintage Freak Bike?

Alenax Transbar Power
Looking for the perfect bike for that End of the World themed ride? I think I found it. Having seen so many crazy two-wheeled contraptions in the basements and garages of collectors over the years, I sometimes think that I've seen it all and that no bike can really surprise me anymore. And that's usually when I'll stumble upon something like this. Notice anything out of the ordinary?

Alenax Transbar Power
How about now?

Alenax Transbar Power
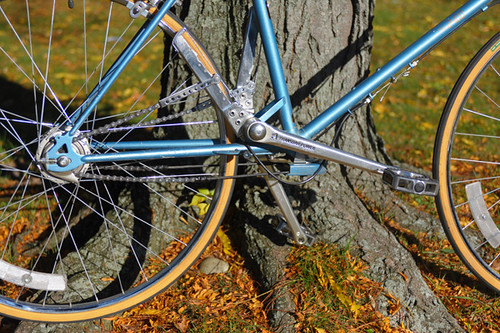
Meet the Alenax TRB 2400, the original Transbar Power bicycle. It was designed to be pedaled using up-and-down motions instead of circular motions. Presumably this was done to approximate the feel of walking, thereby making cycling feel more "natural." Here is a video of this in action. 

Alenax Transbar Power
In leu of a crankset, the Alenax sports two pivoted "transbars." I won't pretend to understand how exactly the system works, but see this article by Jobst Brandt and the Alenax blog for additional descriptions. 

Alenax Transbar Power
A stem-mounted shifter controls the gears

Alenax Transbar Power
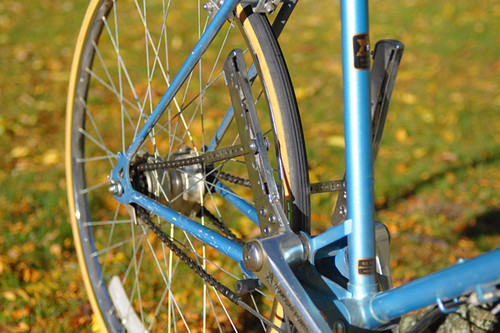
- on Alenax's own internally geared hub.

Alenax Transbar Power
Abundance of cables and chains along the drivetrain.

Alenax Transbar Power
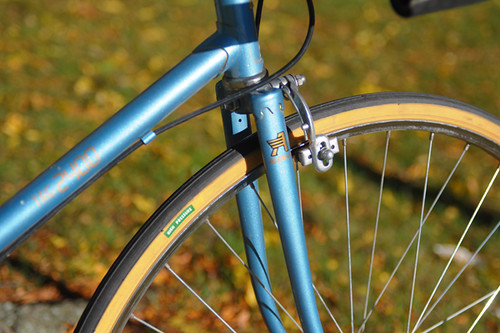
But aside from the pedaling system, the Alenax looks disconcertingly normal. Lugs, skinny tubes, shimmery paint, tan wall tires. It's basically just a typical '80s roadbike, retrofitted to accommodate the Transbar Power system. It is also a good 5lb heavier that a standard roadbike from that era.

Alenax Transbar Power
When Alenax came out with these bikes in 1983, they marketed aggressively, intending to revolutionise bicycle design. They attended all the bike shows, made promotional videos, courted distributors. But amazingly, the concept failed to catch on. By 1993 they threw in the towel, and all that's left today are the (apparently highly collectible) traces of their efforts. At some point more recently, it looks like there was an attempt to modernise and rebrand, but that too does not seem to have worked out. 

Alenax Transbar Power
I am doing some freelance work for Harris Cyclery, and one of the perks is getting to see things like this. Jon Harris dragged the Alenax out of the shop's basement one day, then proceeded to ride it jauntily up and down the block. "It feels a little strange until you get it up to speed," he explained, "but after that it's fine!" The bike is too big for me to ride, so I cannot confirm that. But they do have a partially assembled step-through version in the basement...

Tuesday, December 18, 2012

The Rewards of a Closer Look

Ed's Refurbished Miyata
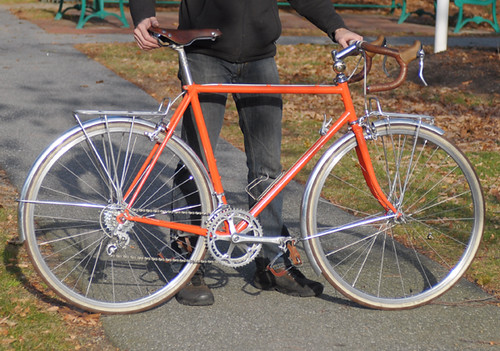
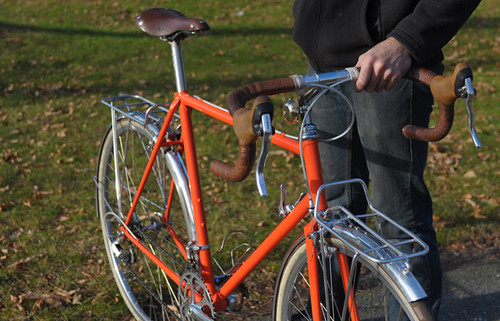
There are bicycles that strike you as unique from the first glance, and then there are those that sneak up on you. When Ed showed me the rando bike he'd put together from a refurbished Miyata frameset, it seemed like a nice enough classic build. Fenders, racks, leather, twine. But on closer inspection, all sorts of curious features emerged.

Ed's Refurbished Miyata
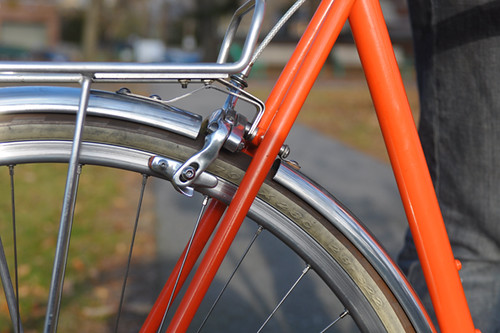
First I noticed the unusual front rack mount. A small DIY bracket at the front curled under and bolted onto the fender. 

Ed's Refurbished Miyata
Initially I assumed this was to add extra stability to the rack. But then I realised the real function of this bracket - in addition to another one extending from the fork crown - was to hold up the fender. Or, more accurately, the front part of the fender. 

Ed's Refurbished Miyata
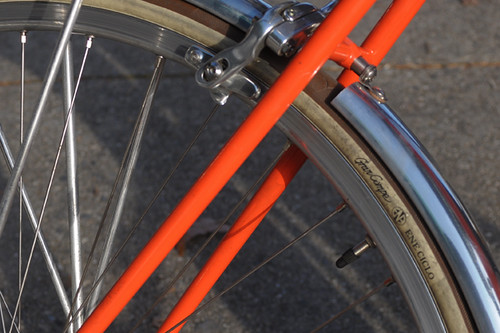
I had seen split fenders before, but what struck me about these was how subtle they were, how utterly integrated into the overall design of the bike. The split was something I noticed only after my eye led me to it as it moved from one end of the rack to the other. 

Ed's Refurbished Miyata
The tires are 700Cx28mm Gran Compe ENE Ciclo (brown, with tan sidewalls) and Ed was determined to make them fit along with the fenders. The split accomplishes this despite the lack of sufficient clearances under the brake bridge and fork crown. 

Ed's Refurbished Miyata
Both the front and rear racks were recycled from older bikes, and I noticed that the rear one was stamped "Jim Blackburn." This prompted me to look into the history of Blackburn Racks, and indeed they were once called by the name of the founder. The vintage racks - now quite sought after - used a single bracket design to connect to the brake bridge, whereas the Blackburns in current production use a two bracket design to connect to seat stay braze-ons. I also found an interesting article describing Jim Blackburn's contributions to research in weight distribution for loaded touring.

Ed's Refurbished Miyata
The components seemed like a random mix, until Ed explained that he was going for a Suntour-inspired build: mostly vintage Japanese (but no Shimano), with some modern VO and Dia Compe sprinkled in. While such a thing would never have occurred to me, gathering components that made sense within this paradigm had been an important part of putting the bike together, a game he'd enjoyed playing.

Ed's Refurbished Miyata
The more we talked about the bike, the more of these things I discovered. Subtle details, hidden meanings. What looked like "just" a nice bicycle at first glance became fascinatingly personal. And that's the thing about bikes. We don't really know what they mean, or represent to the owner. We don't know what the story behind each one is, until we ask. Maybe that's why I still can't seem to walk past a bicycle without a closer look, or at least a second glance. 

Wednesday, October 31, 2012

They Don't Make 'Em Like They Used To: a 1946 Griffon & Howle Rando-Broom

Griffon & Howl Rando Broom
Well, dear readers, it's that time of the year again: the Somerville-Salem 30K. Every Halloween, 13 metaphysically gifted women (we do not use the "w" word anymore) from the Greater Boston area are invited to participate in this historic paceline-style flight from Prospect Hill Tower in Somerville, MA to the Olde Burying Point Cemetery in Salem to conduct the annual New England Air Transportation Alternatives (NEATA) meeting. Invitations are sent just days before the event, and no one knows how the selection process works. Imagine what an honor it was to be invited! With mere days to prepare, I rushed about seeking a suitable flying broom. My own broom, I am ashamed to admit, was woefully inadequate: cheap flimsy plastic thing with nylon bristles, and no accessories to speak of. While sufficient for a quick flight around the block once in a blue moon, it was not the right broom for the Somerville-Salem 30K. I asked around, but no one had anything suitable to lend. Custom broom-makers had year-long wait lists. Finally, I heard from a friend deep in the woods of Virginia (you might know him from the comments here as Spindizzy): He had something for me and would mail it straight away.
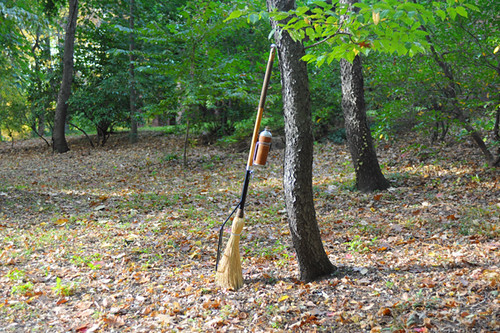
Griffon & Howl Touring Broom
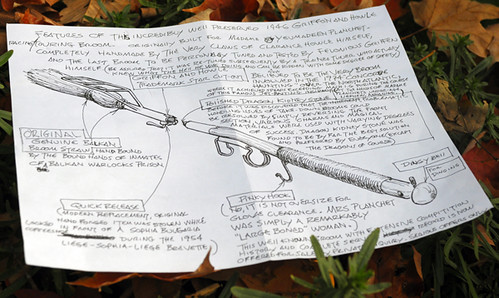
When I received and opened the package, I could hardly believe my eyes: an original 1946 Griffon & Howle randonneuring broom. Spindizzy had just finished restoring it for a customer, to whose mother - a Ms. Yeumadeen Platchen - the broom had originally belonged. When the customer heard that I had been invited to the Somerville-Salem 30K she offered to loan it out for the flight. What luck! You see, Griffon & Howle were the constructeurs of flying brooms, back in the days when fine craftsmanship and attention to detail truly mattered. They used only the finest wooden tubing, the lightest metal fittings, the softest, most aerodynamic bristles. But more importantly, they fabricated all components and accessories in a manner that truly integrated with the broom itself. To hold a Griffon & Howle is to hold a masterpiece. To fly a Griffon & Howle is a privilege that few experience.

Griffon & Howl Touring Broom
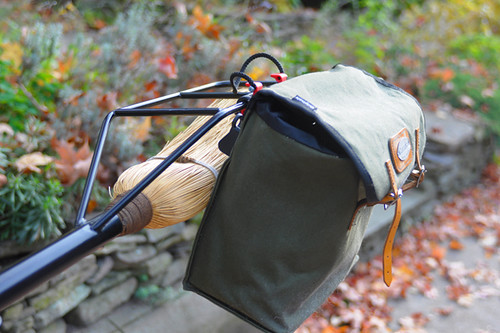
The Griffon & Howle's bristles are organic handbound straw, sourced from the Balkans. Importantly, the rear rack is welded onto the base of the broom, rather than attached via p-clamps or braze-ons. Not only does this provide considerable weight savings, but it is more durable, stable, aerodynamic and elegant. This rack will not shake loose mid-flight. And it looks like it belongs on the broom; it is not an afterthought. 

Griffon & Howl Touring Broom
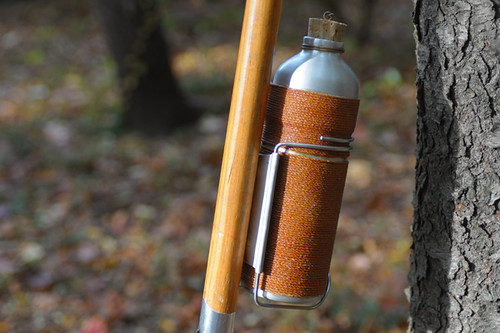
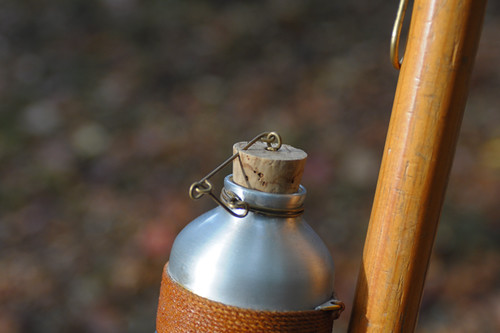
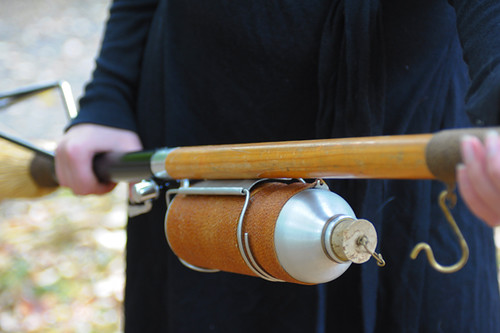
The main part of the handle is constructed out of standard diameter, thin wall wooden tubing, which has been scientifically proven to provide just the right amount of flex for a responsive in-flight feel. The hand-crafted aluminum potion bottle-holder was painstakingly designed to minimise vibrations. Naturally, the potion bottle itself had to be custom made out of military-grade resistanium, as the potion tends to burn through metal and plastic commercially-available bidons

Griffon & Howl Touring Broom
The cork stopper and shellacked twine complete the look.

Griffon & Howl Touring Broom
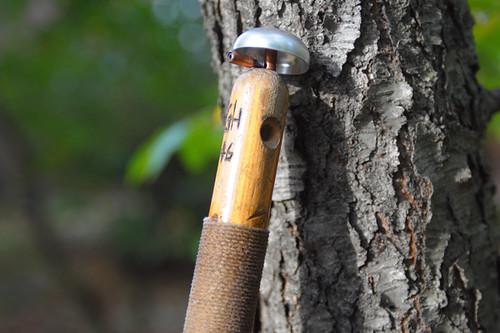
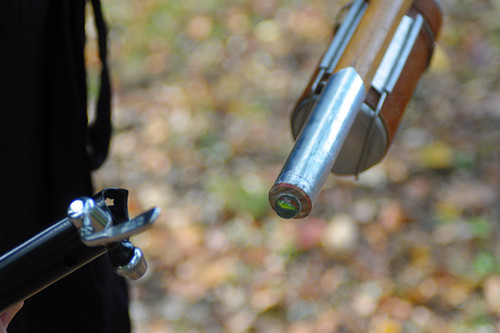
Unlike today's flashy custom builders, the constructeurs abstained from affixing heavy metal badges onto their brooms. Instead, they simply carved their initials and the broom's serial number into the tip of the handle directly underneath the bell.

Griffon & Howl Touring Broom
And while the brass bell may look ordinary enough to the untrained eye, each one was handmade to emit a ring of a signature frequency. The art of this technique has unfortunately been all but lost. 

Griffon & Howl Touring Broom
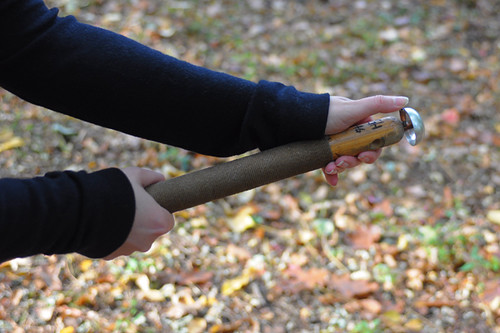
The grip area of the handle is wrapped in twine, woven out of the rarest, most durable silken fibres available. While it is popular today to wrap broom handles in cork tape, this really developed as a result of the rarity of the silken fibres, as well as poor fit. Ideally, the gripping area should be firm to the touch, yet not so firm as to cause callouses. Notice the pinky hook at the bottom of the gripping area, designed to keep the hands in place.

Griffon & Howl Touring Broom
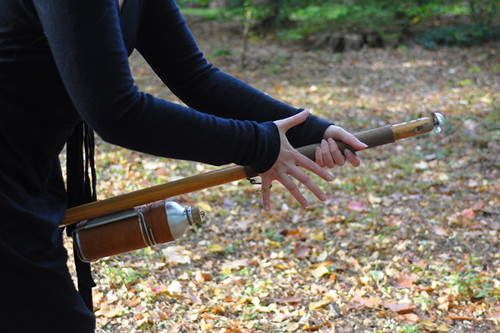
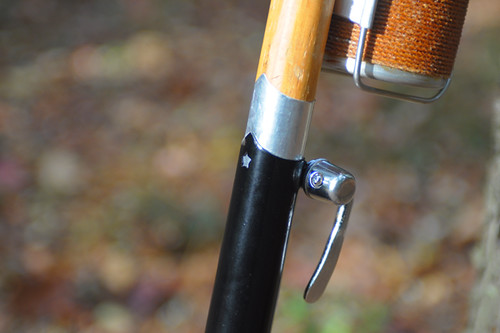
The quick release feature makes the broom suitable for travel and transportation in ordinary-sized packages and suitcases - an invaluable feature in today's high security travel climate. Note that, unfortunately, the skewer is a modern replica replacement. The original fitting was damaged when an attempt to steal this broom was made at a rest stop during the 1954 Liege-Sofia-Liege brevet. 

Griffon & Howl Touring Broom
With a twist of the quick-release lever, the broom quickly disassembles. Mounted to the inside of the upper section is a Dragon's kydneystone, the purpose of which I am not at liberty to describe here - though some readers will know. The star-shaped cutout on the lower section is a Griffon & Howle identifier. 

Holding the broom in my hands, the first thing I noticed was how well-balanced it was. Despite the welded rear rack of considerable size, it was not bottom-heavy but balanced in the center. The technique of the old masters was impeccable. The broom was also remarkably light - more so than the modern plastic and nylon creations so many misguidedly use today.

Griffon & Howl Touring Broom
Having examined the broom extensively and marveled at its craftsmanship, it was time to commence my training for the 30k. With only three days left before the event, my plan was to complete a brief 5k flight around Somerville that evening, followed by a more challenging 10k around Boston the following day. After that I would rest before the Somerville-Salem 30K. As I prepared for my training flight, the first step was, naturally, to find a dark corner of the forest, assume the Chant Position, partake of the potion with which my bottle was filled, and utter the relevant Spell. I was amazed at how intuitive this part of the process was with the Griffon & Howle. The broom triangulated with the forest floor perfectly, allowing the Spirits to enter it just so. While my plastic broom required over an hour of chanting to be adequately prepped, the Griffon & Howle took a mere 2 minutes.  

Griffon & Howl Touring Broom
Next, I gently stepped over the broom whilst holding the gripping area and utilising the pinkie hook, and aimed my gaze at the skies, toward the Secret Constellation. Not having done Kundalini Yoga for Broom Flight in some time, my postures were rusty and I was worried that my skills had deteriorated. However, less than a minute into holding the posture I felt the broom begin to levitate. It was working already. 

Griffon & Howl Touring Broom
A well-balanced broom straightens itself out as it levitates, so that eventually it floats parallel to the forest floor. It is then up to the operator to control the angle. There is debate as to which angle is ideal to start with at take-off and maintain during flight, but in the era of Griffon & Howle brooms it was generally believed that a low-trail configuration provided the best handling.

Griffon & Howl Touring Broom
As I prepared to take off, one thing I noticed was that the broom had an unusually short handlebase by current standards. Most likely it was made for a more petite flyer than myself. The operator is meant to occupy the space between the rear rack and the potion bottle (in broom flying jargon, this space is referred to as the perch), and on the Griffon & Howle it was barely long enough to contain me. Were I commissioning a similar broom for myself, I would ask for an extra 2cm or so of perch length.

Griffon & Howl Rando Broom
As an aside on proper positioning: In the media today, we are inundated with fake and ridiculous imagery depicting women perching on brooms in ways that are not only inefficient, but downright unsafe for flight. The position shown here is the only correct one for paceline flying (the transportational position is considerably more upright, but requires a broom that balances differently). It is also important to understand that any images you might see that appear to depict metaphysically gifted women engaged in actual broom flight are fake: We are not legally permitted to capture this activity on film or digitally. To ensure that this rule is adhered to, a masking agent is incorporated into the Flying Spell that prevents photo and video equipment from recording the operator in flight. As the broom and operator take off, they remain visible to the human eye of bystanders, but cannot be captured by recording equipment of any kind. And so this is the last image I am able to leave you with prior to take-off. 

I can hardly describe my impressions of the 5k maiden voyage without getting emotional. Put simply, I had not known until now what I had been missing all these years of awkward, uninspired flights on cheap and ill-fitting brooms. The Griffon & Howle soared joyously though the skies. Responsive to my movements, it steered intuitively and soaked up air turbulence effortlessly. My heart skipped a beat, as I felt that this broom truly planed. 

Griffon & Howl Rando Broom
For the 10k training flight the next day (yes, I ventured out during Hurricane Sandy!), I added a pannier and wore a raincoat. The pannier was just the right width for the rear rack and there was no heel strike during take-off. The wonderful feel of the flight remained as I remembered it. The fit and the handling were so perfect that, put simply, the broom "disappeared" beneath me. And this, as Griffon & Howle were famous for opining, is the very definition of a well-made flying broom.

After a day of rest, I feel well prepared for the Somerville-Salem 30k this evening and am very much looking forward to the New England Air Transportation Alternatives (NEATA) meeting. I really can't thank Spindizzy and his customer enough for loaning me the Griffon & Howle and for allowing me to document it here for my readers. While I recognise that this is a bicycle blog and not a broom blog, I can't help but feel there might be some common ground here.

Griffon & Howl Rando Broom
For anyone interested, Spindizzy (aka Jon Gehman) does offer complete broom restoration services, as well as custom bicycle racks and other cool and weird accesssories. The full set of pictures of the original 1946 Griffon & Howle randonneuring broom can be viewed here. Happy Halloween everyone!
Monday, October 22, 2012

Echoes of Bikes Past: Yamaguchi Mixte

Yamaguchi Swoopy Mixte
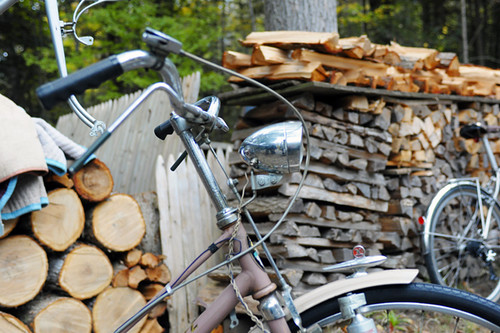
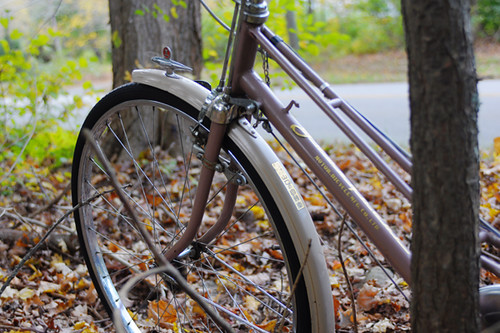
At a gathering of vintage bicycle enthusiasts last week, I spotted this unusual machine and made my way toward it through the sea of French constructeurs. "Aha!" said the owner, "I brought this one especially for you to look at." Yamaguchi Bicycles, Japan. Year, model, and history unknown. Not collectable. Not worth much. Not of interest to many. But what attracted me was its surprisingly elegant combination of design elements not usually seen on the same bike: a mixte frame, roadster geometry, 26" wheels, rod brakes, full chaincase. The colour - straddling the border between beige and mauve - reinforced the theme of blending.  

Yamaguchi Swoopy Mixte
Despite its obscure pedigree, the Yamaguchi was a hit with the vintage collectors; there was just something about the way everything harmonised. It also "looked light" despite weighing over 50lb.

Shimano Trigger Shifter, Yamaguchi Bike
From a historical perspective, an interesting feature of the bike is the very early Shimano 3-speed trigger shifter. I have never seen one of these before, and could not find examples online allowing me to establish the date of manufacture.

Yamaguchi Swoopy Mixte
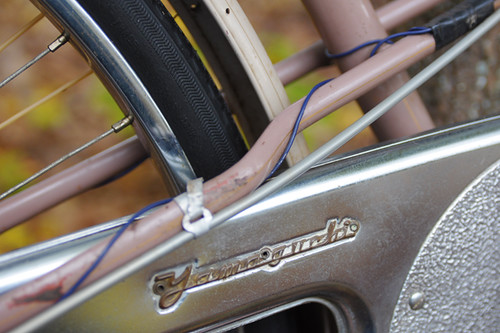
As far as frame construction, it is neat how they kinked the right lateral stay so that it would clear the massive chaincase, then routed the shifter cable and dynamo wiring along that stay. 

Yamaguchi Swoopy Mixte
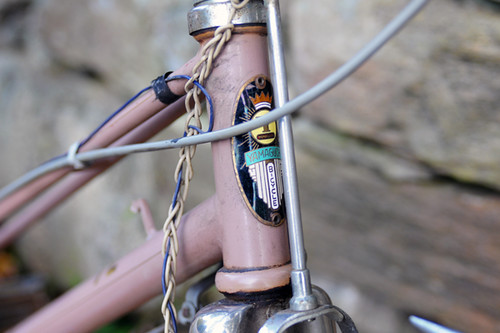
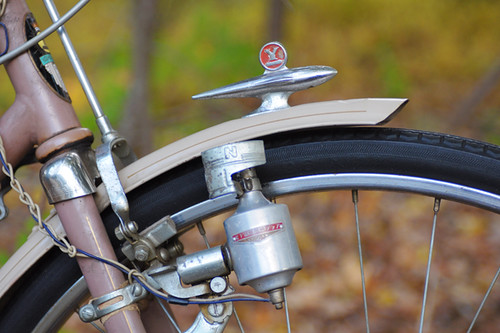
Another interesting thing is how thoroughly branded this bicycle is: Every part of the frame, many of the components, and even the bolts used sport the Yamaguchi name.

Yamaguchi Swoopy Mixte
Yamaguchi fender ornament.

Yamaguchi Swoopy Mixte
Yamaguchi cranks, including dust caps.

Yamaguchi Swoopy Mixte
Yamaguchi saddle.

Yamaguchi Swoopy Mixte
Noticing a decal that mentioned motorcycles, I incorporated that into my search and found mention of a company that went out of business in the late 1950s. This could be them. Later a reader posted a link to a Japanese blog showing some photos of Yamaguchi "Gold" roadsters, which is the only other significant mention of the brand I've encountered so far.

Yamaguchi Swoopy Mixte
Over the decades, bicycle manufacturers all over the world have come and gone. Some of them have left a mark in history and others disappeared without a trace. The Yamaguchi roadster-mixte is in the latter category, which makes its elaborate branding and unusual design all the more intriguing. Did the manufacturer have plans for this bike to become popular, or was it merely a promotional item for their motorcycles? How many of these were produced? How did this one make its way to the US? These things we may never know.

Yamaguchi Swoopy Mixte
Recently a friend and I were talking about all the new bicycle brands popping up on the market today, and speculating which of them will last. History suggests that most will not. But maybe now - with all the forum chatter and other electronic traces of things - we will be left with more detailed records of the brands that disappear. Stories of failure are just as historically significant as stories of success, and it's a pity these stories tend to get lost. Trying to reconstruct them is one reason I like finding obscure vintage bikes.

Monday, July 30, 2012

Rare Old Beast: a Very Early Brompton

Early Brompton
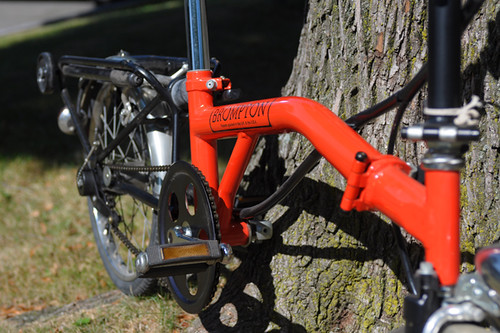
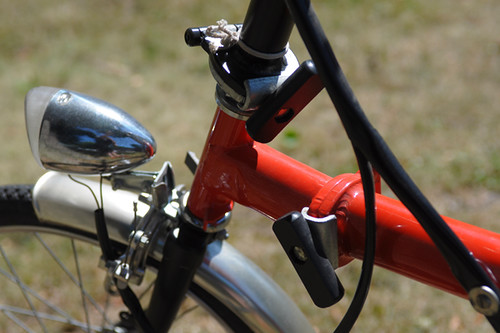
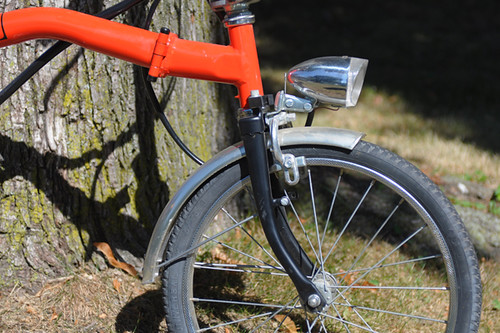
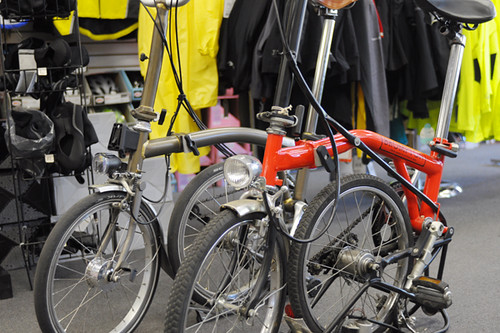
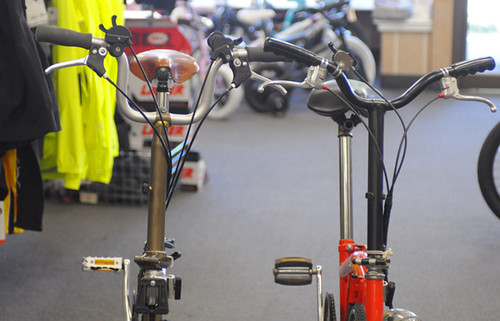
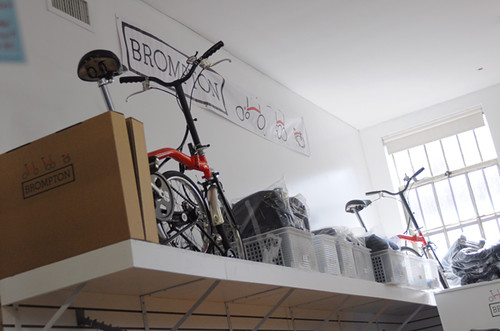
Brompton folding bikes have remained virtually unchanged since they entered into production in the late 1980s. But before that happened, there was a small pilot run and the machines from this early batch were just a tad different. Only several hundred of these were made. Two of those recently ended up passing through Harris Cyclery on their way to the Brompton museum. And one of those I had the opportunity to photograph and ride. Pictured here is the 358th Brompton ever produced. Red and black 3-speed with upright handlebars, dynamo lighting, rear rack and fenders. 

Early Brompton
The most striking difference between the Brompton we know today and this early model is the "humpback" frame construction. As the Brompton history page explains it, "this feature had come about for the simple reason that standard pipe-bending tools could not produce the gentle radius desired. Change would only come with expensive retooling." By the time the bikes went into full production, the capital investment required for this had been secured and the bend of the main tube became more elegant.

Early Brompton
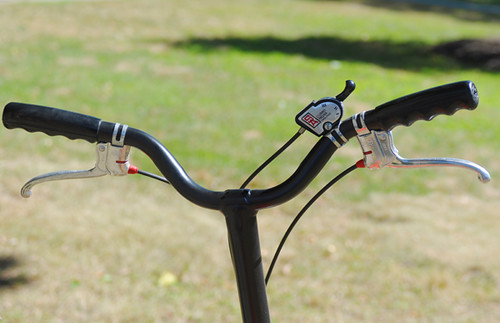
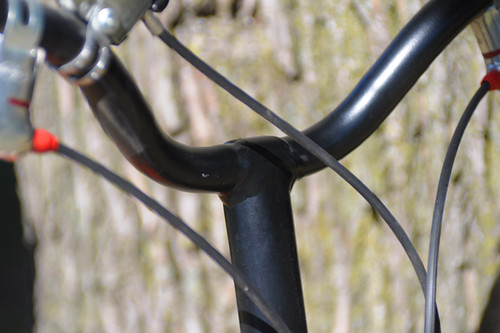
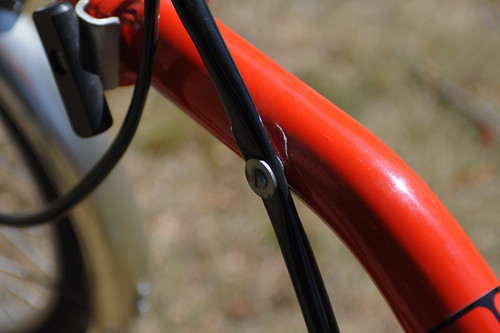
Other differences are more subtle. For instance, the handlebars are welded(?) to the stem.

Early Brompton
Here is a close-up. I take it this means the early handlebars were steel. 

Early Brompton
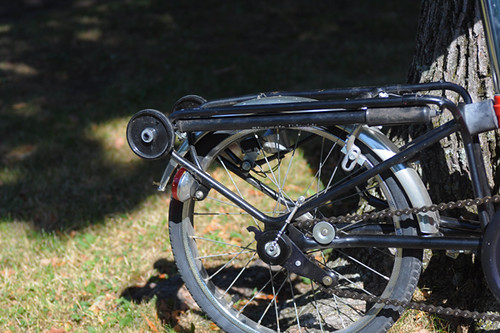
Likewise, the rear carrier is welded to the rear triangle.

Early Brompton
Like so.

Early Brompton
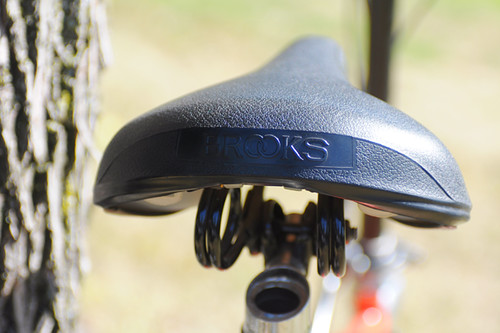
The bike comes with a wide, sprung plastic Brooks saddle.

Early Brompton
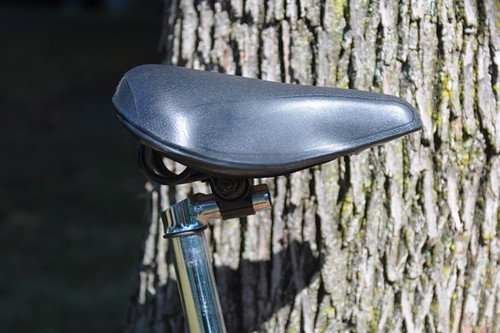
Fitted onto a set-forward seatpost.

Early Brompton
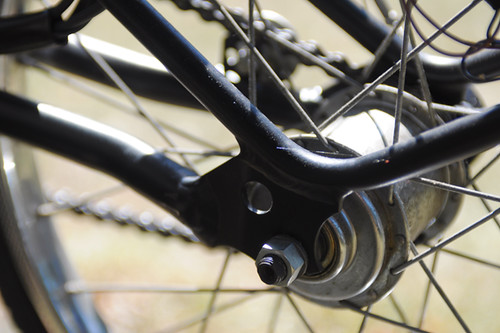
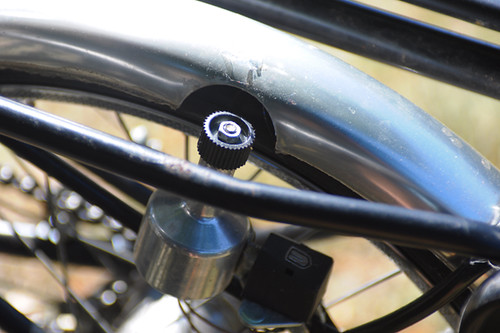
The dynamo lighting functions via a bottle generator on the rear wheel. The rear fender has a special cut-out to accommodate it.

Early Brompton
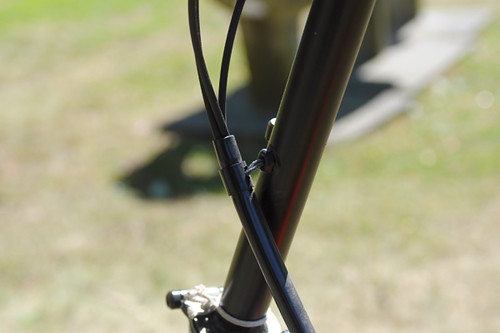
The cable routing is interesting.

Early Brompton
If I understand this correctly, it appears that several cables are gathered into the same housing and secured to the frame and stem at various points to facilitate the fold?

Early Brompton
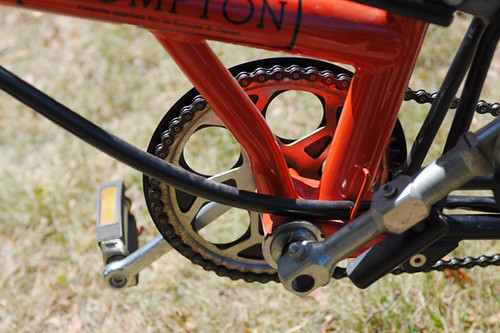
Here it is passing over the bottom bracket. 

Early Brompton
The fold itself is mostly identical. Same process, with similar bolts on the frame and stem as on the current production model.

Early Brompton
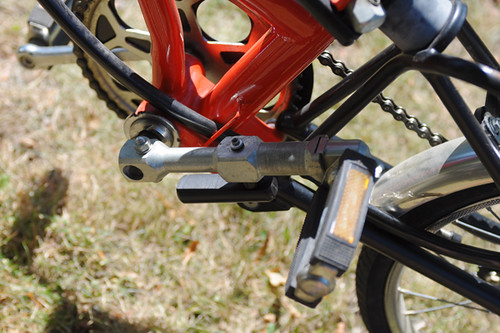
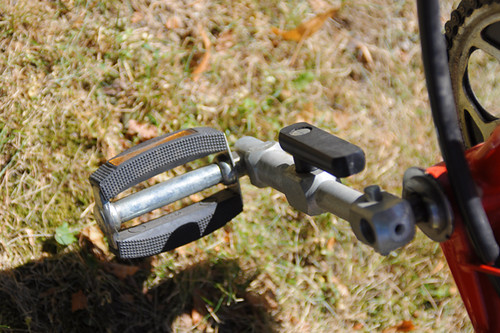
Only the pedal fold is different. 

Early Brompton
Levers are involved; it is more complicated and bulky than the current snap-fold.

Early Brompton
Finally, it looks to me as if the frame construction itself is different in places - the way the tubes are joined. The other differences are mainly in the components. The retro lights. The fender stay attachment. There is no front block system, and instead some of the early models were fitted with front racks. Brompton experts will no doubt notice a myriad of other differences that I haven't picked up on. As far as weight, the bicycle felt a bit heavier to pick up than current production models built up with equivalent specs, but not by much. 

Early Brompton
I rode the older bicycle carefully and briefly - not wanting to ruin its pristine condition (it had barely been ridden by the previous owner). The first thing I noticed was that there was much less room in the "cockpit" compared to my own Brompton; it felt a bit cramped. The difference seemed too great to be explained by the older bike's saddle being more forward; it seemed that the frame itself was shorter. Later I asked about this at Harris and was told it was indeed the case. Unfortunately I had no time to measure the two bikes, but it appears that when they got rid of the bend in the main tube, they also lengthened it.

Early Brompton
However, the front-end handling of the older bike felt very similar, if not identical to modern Bromptons. Overall, riding it felt like riding an older and more upright version of the same bike. Reading Brompton's history and hearing about it firsthand from those in the know, it is striking how little the bicycle has been tweaked since its initial development. Aside from straightening out the bend after the pilot production run, they've mostly just worked on getting the weight down a bit and improving the components. The fold and the handling have remained the same.

Early Brompton
For locals who'd like to see the pair of early Bromptons, they will remain on temporary display at Harris Cyclery until September. Many thanks for the opportunity to photograph and ride the #358! You can view more close-ups of it here, and Elton Pope-Lance has photographed both bicycles here.