Showing posts with label lights. Show all posts

Thursday, July 12, 2012

Dynamo Lighting Kit for Roadbikes

Temp Dynamo Solution: Cyo Headlight Mounts on Brake
While I am generally a huge fan of dynamo lighting, I do not have it installed on what is currently my only roadbike. My plans for the bike did not involve significant amounts of night-time cycling; it was not meant to be a touring or randonneuring bike. For occasional riding in the dark I do have an excellent rechargeable battery headlight that lasts for hours and attaches easily to the handlebars. And I have an equally good tail light that attaches to the back of my saddle wedge tool bag. To install a dynamo hub wheel and lights on this bike would have added unnecessary weight and expense to the build.

I felt pretty good about my bike's lighting setup until I found myself wanting to join an overnight ride. Initially I thought that my super duper rechargeable battery headlight would last through the night. But when I did the math it became clear that it would not; I would need to add a second headlight and to bring several sets of spare batteries. Even at the height of summer an overnight ride in New England means 8+ hours of riding in the dark - and not the kind of milky suburban dark where you can leave the light on a low setting to conserve battery life; proper boonies dark that requires a powerful headbeam. I talked to the others doing the ride, and they all had dynamo lights. Now I felt foolish for not having a bike with appropriate lighting. But at the same time, how often would I do rides like this? 

Temp Dynamo Solution: Loaner SON Hub Wheel
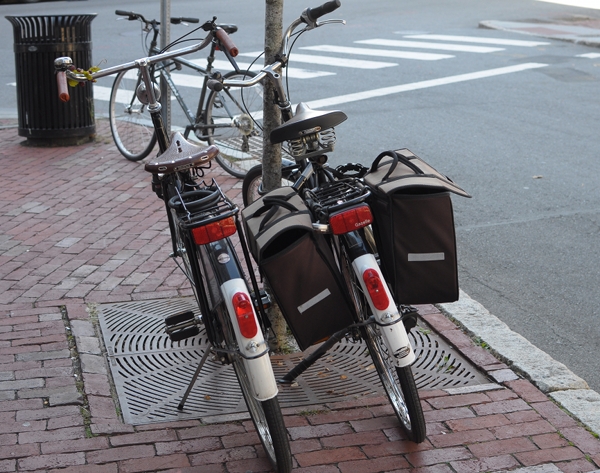
I was discussing this with local cyclist Pamela Blalock and she offered to lend me her mobile dynamo setup: a spare front wheel with a dynamo hub, and lights that are easy to attach and remove. With this kit, she can turn any 700C wheeled roadbike into an overnight bike. Extremely grateful to Pamela for the offer, frankly I was also skeptical that it would work out. To me, dynamo lighting was something that gets permanently installed - not attached and removed on a case by case basis! Furthermore, my bike has no fenders, no racks, no braze-ons. Could the lights be attached securely? I was worried that the installation process would be tricky, and that in the end something would end up falling off, disconnecting, or malfunctioning. 

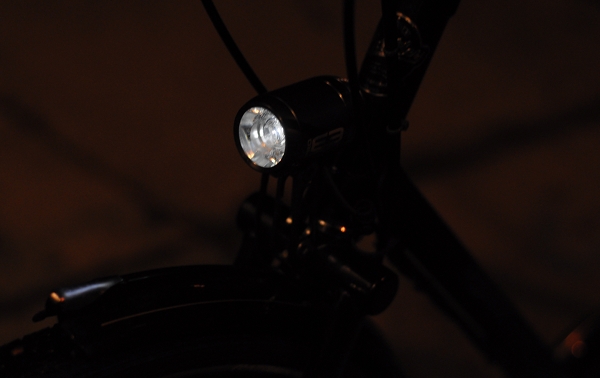
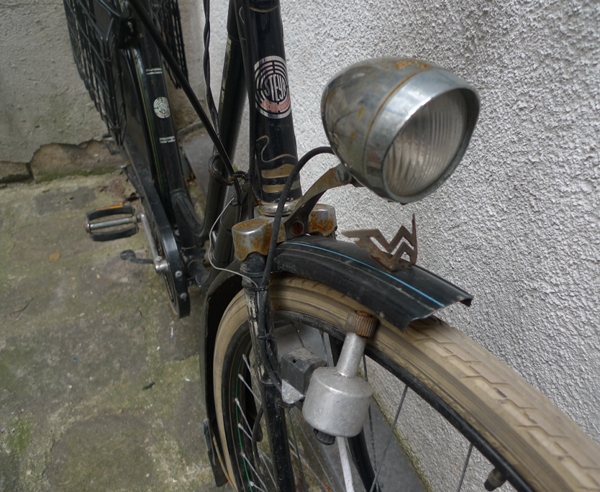
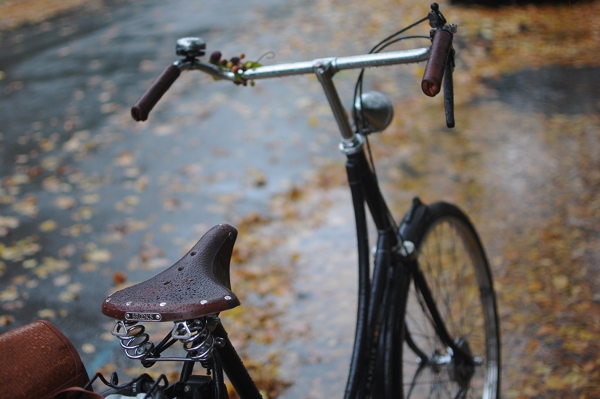
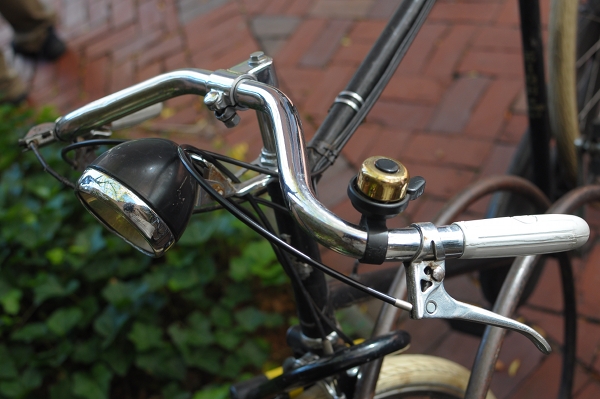
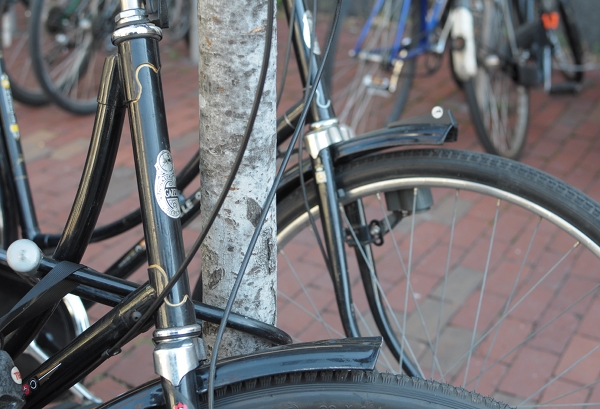
To my amazement, the installation process took mere minutes. The front wheel switch was seamless and soon my bike was sporting a dynamo hub. Then the headlight was attached to the brake bolt, as shown in the first picture. A thin cable runs straight down from the headlight to the hub, easily secured to the fork with a piece of tape.

Temp Dynamo Solution: Pixeo Tail Light on Stay via P-Clamp
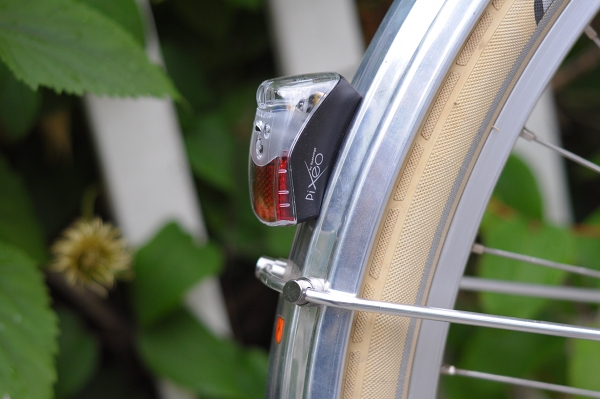
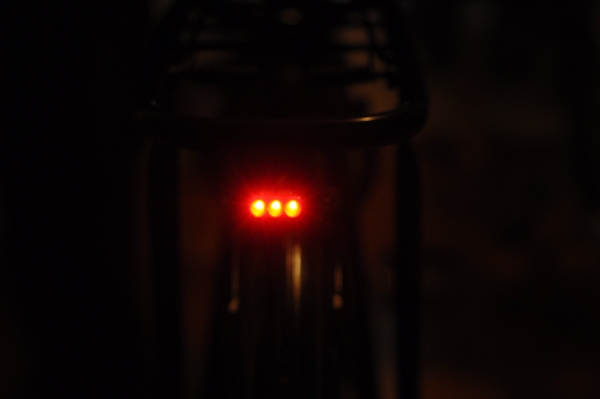
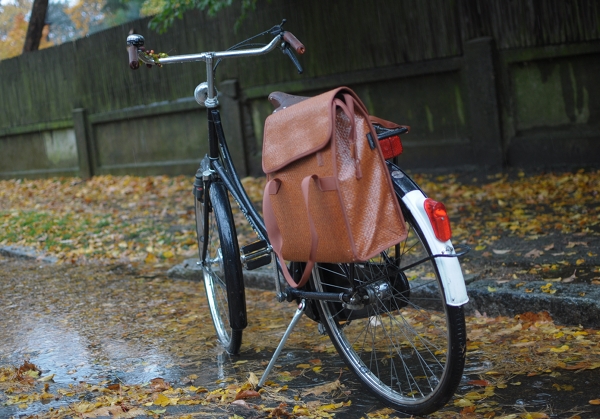
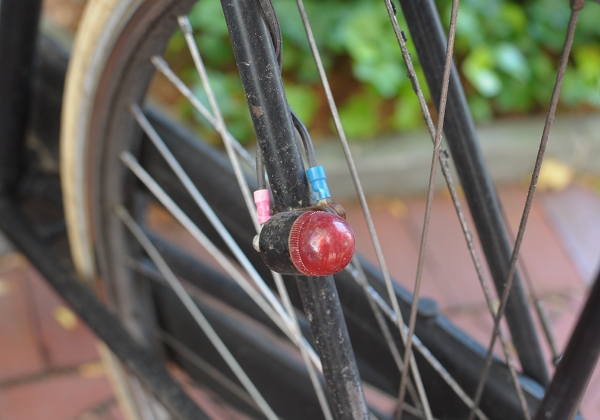
For the tail light, a P-clamp was installed on the left chainstay. The wiring got routed along the chainstay and the top tube, secured with zip ties to the brake cable. The result was not beautiful, but neither was it flimsy. It was secure and problem-free. The positioning of the headlight and tail light beams were spot on. 

Later I learned that other local cyclists employ a similar system for when they ride in the dark - a dynamo hub wheel and lights that get moved from bike to bike as needed. I would not have thought this to be a good idea until I tried it myself and experienced how easy and hassle-free it was. On a dedicated randonneuring or touring bike, it makes sense to have dynamo lighting permanently installed in a more elegant manner. But for those who want the option of using their pared-down roadbike for occasional night time riding, a kit like this can be a good solution. Pamela's setup includes a 32 spoke Velocity Aerohead wheel built around a Schmidt SON hub, a Lumotec Cyo IQ headlight and a Spanniga Pixeo tail light - though many alternatives exist. 

At least here in New England, there seems to be an increasing amount of cross-over between road racing, randonneuring, endurance events, and casual long distance rides. And this cross-over is influencing how roadbikes are defined and equipped. I am still unsure what kind of cycling I will ultimately gravitate toward. But if more night time rides are in my future, a versatile dynamo setup like this is certainly worth considering.

Sunday, June 24, 2012

Aesthetics of Use

Pamela's "Green Queen" Cielo Cross Classic
This morning I came across the phrase "aesthetics of use" when it appeared in Bill Strickland's description of his muddy cycling shoe. It is a term I often hear thrown around by artists and designers. In essence, it means that to see an object in use is beautiful - that an object reveals its true self not on display, but in action. Some makers like to think of the aesthetic direction their objects take in the new owners' hands as a happy surprise. Others try to control it. Others still encourage what might be called hyper-use (or at least superficial signs of such), believing that distress enhances the appeal of their creations. These attitudes can be discerned in the manner manufacturers describe and promote their products. Owners' attitudes run the gamut as well. Some emulate the manufacturer's vision in their use of the object, while others are intent on making it their own. 

Pamela's Seven Axiom SLX
Thinking of these differences, I am reminded of Pamela Blalock's bicycles. A local randonneur who probably spends more time in the saddle than not, she has a few bikes and they are very nice ones. At some point I had it in mind to test ride and feature some of them here. But the more I examined them, the more I realised that the bikes say more about Pamela herself than they do about the manufacturers and models they started out as.

Pamela's "Green Queen" Cielo Cross Classic
Befendered, weathered from winter commutes, and covered in all manner of curious contraptions, "Cielo Cross bike" hardly seems like an apt description for the magnificent creation that is the Green Queen - Pamela's transportation bike. Fixed gear, rear rack, dynamo lighting, possibly more than one bell - these things make sense to her; the bike is clearly built with a purpose.

Pamela's Seven Axiom SLX
Neither is it really accurate to describe her roadbike as a Seven Axiom and leave it at that. While I do not think Pamela was the first to put dynamo lighting and bar end shifters on a Seven, she certainly managed to do it in a way that looks eye-catchingly unusual - blurring boundaries between racing and utilitarian riding and making others question their own understanding of these boundaries. The visually distinct setup reflects preferences that developed out of personal experience. Pamela came up with these ideas from doing years of long brevets and endurance races. It's what works for her in use, and the aesthetics are merely a by-product. 

Pamela's "Green Queen" Cielo Cross Classic
We all have our own ways of using objects, of gaining experience, and then of changing the way we use objects as a result of what we learn from experience. We can follow a manufacturer's vision, we can imitate those whom we admire, we can heed the advice of the more knowledgable. But ultimately we each have our own trajectory to follow. Aesthetics of use are personal; they are not generic, rigid ideas of how an object ought to be utilised. 

Tuesday, November 1, 2011

Aftermarket Dynamo Lights: a Clean Look

Routing Wiring for Dynamo Lighting
When setting up dynamo lighting on a bicycle with no provisions for it (i.e. no internal routing or special braze-ons), there is always the question of how to route the wiring so that it looks "clean." After all, no one likes to see black wires coiled around a frame's fork and tubes. When setting up the lights on my Rivendell some time ago, the Co-Habitant and I developed a nice method that is practically invisible, and I've been meaning to share it. So when we recently did the same to my Bella Ciao, I made sure to document it.

Routing Wiring for Dynamo Lighting
This method assumes that your bicycle is equipped with fenders, and that you are installing both a headlight and tail light. I will also assume that you already know how to connect the lights themselves; this is not meant to be an electrical tutorial.

Routing Wiring for Dynamo Lighting
The key to our method is using as little wiring as necessary - running it in a straight line parallel to existing stays and tubes, as opposed to coiling it, and securing it with colour-matched zipties. It's a simple idea, but colour-matched zipties really do blend in with the bicycle when all is said and done. You may be surprised to learn that they are available in all sorts of colours - from bright rainbow hues, to neutrals such as clear, white, cream, taupe and gray. We use small gray zipties to route the wire from the tail light along the non-drivetrain side fender chainstay. 

Routing Wiring for Dynamo Lighting
In natural light, the result looks like this.

Routing Wiring for Dynamo Lighting
We then proceed along the non-drivetrain side chainstay, using a larger colour-matched ziptie. This frame is a sort of pale military green, and this beige ziptie blends in nicely.

Routing Wiring for Dynamo Lighting
Continuing the same underneath the bottom bracket.

Routing Wiring for Dynamo Lighting
In natural light, the wiring really does "disappear" when routed in this manner, staying close to the chainstay.

Routing Wiring for Dynamo Lighting
If your frame already has shifter cable braze-ons on the downtube as this one does, then you can simply attach the wiring to the shifter cable itself (small black zipties this time). Otherwise, use two large colour-matched zipties for the dwntube, like we did here

Routing Wiring for Dynamo Lighting
For the headlight, you will need to leave enough wire so that your ability to turn the handlebars is not constricted. We prefer to achieve this by creating a coil here. To do this, simply wrap the wire tightly around a pen or a stick.

Routing Wiring for Dynamo Lighting
And voila, there is your coil. Notice the additional ziptie along the shifter cable, just to keep everything neatly in place.

Routing Wiring for Dynamo Lighting
Finally, use the same colour-matched zipties along the fork as you did along the chainstays, routing the wire to the hub as tautly as possible.

Routing Wiring for Dynamo Lighting
Even frames with internal routing often lack provisions for the fork, and here I find it especially important to find zipties in a colour that blends in with the paint - otherwise it can look as if the fork is cut into pieces, its elegant curvature disturbed. I am using my camera flash to show the process, but in daylight this really looks quite unobtrusive.

Routing Wiring for Dynamo Lighting
In natural light up close.

Routing Wiring for Dynamo Lighting
And from further away.

Having used this method on three bicycles now, I am pleased with it and don't particularly covet frames with provisions for internal routing. Nothing has ever come loose, and visually I am pretty happy with it. You are welcome to use our method, or to share your own.

Wednesday, August 3, 2011

Bad Vibrations

Shimano Alfine Hub
Riding my Rivendell last weekend, I was going downhill when I became aware of a strong vibration in my hands from the handlebars. At first I thought I was imagining it: This felt like "shimmy" and I know this bike does not have shimmy; this has never happened before. Was the headset loose? At the bottom of the hill I stopped to check, but everything seemed fine. Then I noticed that my lights were on. I must have forgotten to turn them off from the previous night. And then it hit me: Could this be the dreaded high-speed dynamo hub vibration? Jan Heine mentioned it in a recent Bicycle Quarterly article, and Somervillain reported it after building up his latest bike. In both cases, Shimano hubs were involved. The hub on my bike is a Shimano Alfine.

I turned off the light and began to cycle again, picking up speed. No more vibrations. Turned the light back on and picked up speed once more. Again the handlebars began to vibrate. Yikes. The only way I can explain not having noticed this earlier, is that I must have never gone this fast with the lights on before - which makes sense, because I normally only turn them on when it's dark and I cycle slower  in the dark. This time I accidentally left them on in the daytime, and when I first noticed the vibration I was going about 25mph. But once I began to pay closer attention, I could feel it starting at 17mph or so.

Schmidt SON Dynamo Hub
The following day I rode the same route on the Randonneur and intentionally turned the lights on. This bicycle is equipped with a Schmidt SON Delux hub. I did not feel handlebar vibration at high speeds. Reading up on this issue some more, the vibration effect has been reported for many different hubs, including Schmidt - though not the SON Delux model specifically, as far as I can see. Is the SON Delux immune to this?

I am frustrated to experience the vibration on my own bike with the Shimano Alfine. At the time I was choosing a dynamo hub for this bicycle, the considerably more expensive Schmidt seemed frivolous, and everyone assured me that in practical use (as opposed to efficiency tests) the new Shimano models worked just as well. However, my recent experience appears to contradict this. It is disappointing to learn that I am limited to cycling at speeds below 17mph if I want to have the lights on without my handlebars vibrating.

Some have suggested that it is not the dynamo hub itself that's responsible for the vibration effect, but that it is a complex interaction between the hub, wheel size, and frame. That could very well be, and if so it will take forever to uncover the pattern of causality. What have been your experiences with dynamo hubs and vibration at high speeds?

Tuesday, June 14, 2011

Tail Lights and Auto Settings

What do you think of using bicycle lighting with automatic sensory settings? Several of our bikes are equipped with lighting systems that allow for this, but I have mixed feelings about the auto-mode.

Last week the Co-Habitant installed the Spanniga Pixeo tail light on his bike (very thorough review of this light here) and set it on auto. Cycling together later that evening, I switched my own lights on when dusk fell. As I rode behind him, his Pixeo tail light would switch on and off in response to slight changes in lighting conditions. For example, as we entered a stretch of road with fewer trees, it would switch off; then on again when the trees became more dense. Not only did I find this annoying while cycling behind someone, but I was also surprised that the light did not "think" it was dark enough to just stay on the entire time. It wasn't quite pitch black, but getting there. I wonder how the settings are configured, and whether they can be adjusted.

I have an auto ("senso") feature on my Busch & Mueller dynamo lighting as well, that I sometimes use and sometimes do not. Because this system includes a headlight, I can tell whether the auto mode is performing the way I want it to. If it gets dark but my headlight does not automatically turn on (which means the tail light is not on either), I will just switch it to the permanent "on" position. With a battery-operated tail light like the Pixeo and others, there is no way to get this feedback. Since you can't see you own tail light while cycling, you have to be confident that its "idea" of when's dark enough is the same as yours. For me that is not always the case with the lighting I've tried, which is why I am not that crazy about auto settings. What has been your experience?

Wednesday, May 18, 2011

Are You Afraid of the Dark?

How dark does it get where you cycle at night? Some of us travel mostly on lit city streets, others in sparsely lit suburbs, and others still along pitch black country roads. 

Last week I rode a good chunk of a 10 mile trip home in complete and utter pitch darkness. Even with my good LED headlight, I could only see a small part of the path ahead of me at a time, but eventually my eyes grew accustomed to the dark and I began to distinguish other clues. I went at a steady pace of about 12mph, which was sufficiently slow for me to recognise upcoming turns and obstacles on the road. A small fox trotted across my path once, crossing from one side of the meadows to another. I stopped and watched her wet fur glistening in my headlight beam, then continued on my way. At another point, a raccoon considered dashing to cross in front of me, but changed his mind and observed me from the side of the road as I cycled past him. I also encountered a few late-evening joggers and commuter cyclists, all of whom I was able to spot in advance at the speed I was going. Any faster though, and I don't think it would have been safe on that particular trail. Local cyclists are always ending up in hospitals from crashing into one of the gates and dividers that are placed there.

I know that randonneurs will go over 30mph on winding descents in the dark, but I am not there yet. Even as recently as last summer, I was terrified to cycle on winding unlit country roads in Maine and New Hampshire. But now I'd like to try it again.

I have LED headlights on most of my bicycles now, and the Co-Habitant has just updated his Pashley's stock lighting with the Supernova E3. The front and rear standlight features are on the dim side, but we think that is due to the bicycle's barely adequate 2.4W dynamo hub. When in motion, the lights are super-bright.

While good LED lighting is important, I think that cycling in the pitch dark also requires a certain degree of skill, as well as knowledge of your bicycle's handling and familiarity with local terrain. What's the darkest you're comfortable with when traveling by bicycle?

Monday, February 7, 2011

Turn Signals and Brake Lights: Can It Be Done, Elegantly?

[Steyr Waffenrad c.1925; image via radlmax]

I know that I am not the first to bring this up. But when I see details like this from 85 years ago, I wonder what it would take to develop a modern, elegant mechanism whereby squeezing the brake levers on a bicycle would activate a flashing tail light. And furthermore, what it would take to develop an unencumbered, easy to use system that allowed for turn signal lights to be displayed without the cyclist having to use hand signals - which, from personal experience, I know are not always visible to motorists and are not always possible to execute.

While various turn signal and brake light kits for bicycles already exist, they are not popular. And I suspect the reason, is that the currently available ones either turn the bicycle into a science project monster covered with a mess of wires and gadgets, or are just not convenient to use. But what about a simple, attractive design that would integrate with a classic bicycle seamlessly? a design that a "normal person" (i.e. not someone who is into gadgetry) would find appealing and easy use?  I find it surprising that various labs out there are developing  prototypes of all sorts of crazy futuristic bikes without drivetrains or spoked wheels, yet the idea of brake and turn lights does not seem interesting or useful enough for anybody to pursue seriously.

If I had the funds and influence to do so, I would love to sponsor a contest with precisely this goal in mind - but unfortunately, I don't think that knitted hats and the "honor" of being featured on Lovely Bicycle alone have sufficient pull to convince electrical engineers to spend their time working on such a project. If anybody in the industry is interested in getting involved as a sponsor, please do get in touch.

What are your thoughts on this? If designed to integrate with the bicycle seamlessly, would you find a brake light and turn signal system useful, or not particularly? And in the event that you already have one installed on your bike, which one is it and how is it working out for you?

Sunday, November 21, 2010

Fondness for the Bottle

With the excellent modern dynamo hubs that are now available on the market, it might seem that using a "bottle" generator is a hopelessly outdated and clearly inferior method of powering bicycle lights. We imagine crusty old bottle dynamos making high-pitched hissing noises, powering feeble halogen lamps. Surely such a system cannot provide sufficient illumination. At least that was my thinking, until I actually used a bike with a bottle dynamo to get around in Vienna earlier this year. It was not a totally ancient bottle, but a couple of decades old and definitely crusty from use. And to my surprise, it powered my bike lights just as well as the dynamo hub on the modern Pashley I had back in the States at the time.

The vintage Gazelle I now ride as my main transportation bike has a bottle generator as well - this one from the 1990s. It is well-used and worn out, but works fine - both before and after we converted the lights on this bike to LED.

While I am not suggesting that a bottle dynamo is "better" than a hub, I think that it does have some underrated virtues, and that in some cases it can make sense to use it. Consider, for example, that...

Bottle-powered lights are just as bright.  Most modern bottles can handle the exact same voltage as most modern hubs (6 volts / 3 watts).  This means that I can use the same LED lighting set-up with a bottle as I would with a hub. There are differences in efficiency and a few other factors, but when using a bicycle for transportation at urban speeds, I have never felt this difference. 

The bottle is easy to install.  If you don't yet have generator lighting on your bicycle, installing a bottle is a matter of clipping it to the fork, or to one of the rear stays, using a bracket. Installing a generator hub is considerably more difficult: You must either rebuild the front wheel around the hub, or buy a new wheel with the hub pre-installed. 

The bottle is less costly. A good dynamo hub costs around $80 on average, plus the wheelbuilding fee (or the price of a new wheel) - which can run rather high. In the EU, a decent bottle can be had for under $30, with no additional fees involved.

The bottle is independent of hub/wheel functionality.  If your bottle dynamo breaks, it is not a big deal: buy another one. If your hub dynamo breaks, you will have to not only buy another one, but also rebuild the wheel or buy a new wheel.

The bottle weighs less! Surely that's an important factor for all of you out there counting grams on your roadsters and Dutch bikes?

Because my vintage Gazelle's bottle has seen some wear, I will soon replace it with this Nordlicht HQ that an acquaintance has sent from Holland - which is both a more modern, and a more classic-looking model.

And I also have this modern B&M dynamo that I acquired second-hand and plan to install either on my Bella Ciao or on my Raleigh DL-1.  I am curious how these will perform in comparison to each other, as well as in comparison to the older AXA that is currently on my Gazelle - though I suspect I will not feel a difference.

I know that most of you probably prefer hubs, and I myself have excellent generator hubs on my touring bicycles. But sometimes a bottle is just a simpler solution - especially when the bicycle itself is simple. If only the choice of commercially available bottle generators was as rich in the US as it is in the Netherlands! Does anybody else out there use bottles? anybody prefer them?

Thursday, November 4, 2010

Water, Water Everywhere

In the morning they did warn me
it would be a day of rain.
But how could I've predicted
such tumult on its way!
Stroke after stroke I pedaled
with a swift and forceful motion,
but water fell upon me
as if amidst a stormy ocean.
Water, water everywhere
and not a drop to drink!
Water, water everywhere,
my bike did nearly sink!

And so November is upon us, and with it the November Rain.  Funny, because I don't remember it being quite this bad last year, but I've probably just blocked it out. Today it rained so hard, that the water not only covered my face, but went inside my nose and mouth. Feeling as if I might drown while cycling was a curious sensation. I could hardly see anything in front of me, but thankfully drivers seemed to all be showing remarkable courtesy. Maybe they just couldn't believe that a cyclist was on the road in such a downpour and felt sorry for me. 

When it is raining this hard, I prefer to be on a heavy, upright, and exceptionally stable bike. When I owned my Pashley, I often talked of how good it was for cycling in the rain. To my relief, the vintage Gazelle is the same, if not better. The handling makes this bike unfellable. The enormous wheels and wide tires part lake-sized puddles, grip slippery surfaces, and float over potholes. The fenders release a mighty spray and keep my beige raincoat beige. Defiant in the downpour, I cycled with dignity even as water streamed down my face. And I arrived at my destinations only slightly worse for wear.

The other two things I like to have when cycling in the rain are good lights and a saddle cover. I was not sure how well the bottle dynamo would function when wet, but it was absolutely fine (I am beginning to develop a  fondness for the bottle) - and my LED-modified headlight made me highly visible. As for the saddle cover, despite having accumulated many Brooks covers at this point, my preferred method is to use a ratty plastic grocery bag. The plastic bag performs two functions: it is more waterproof (gasp!) than a Brooks saddle cover, and it makes the bicycle look considerably less appealing to thieves. Not that many thieves would be tempted to drag away a 50lb clunker with a locked rear wheel in a downpour...

And speaking of dragging: I must say that carrying a wet, slippery 50lb bicycle up the stairs is even more delightful than doing so with a dry one. I have noticed that when it comes to lifting a heavy step-through, it is important to find a comfortable spot to grip - one that is well balanced and will prevent the bicycle from twisting or buckling in my arms as I attempt to maneuver it. Despite being heavier than my previously-owned Pashley, the Gazelle has a better "sweet spot" in this regard, and so I find it easier to carry... just not when the frame is slick from the rain. Still, I managed to wrestle the enormous Dutch creature up the stairs and through the door without either of us taking a spill, after which we had a cup of tea and recited poetry together. It is essential to have a bicycle that is more than a fair weather friend. 

Wednesday, October 20, 2010

America's Vintage Bike Capital?

I wonder whether there is a way to get some official acknowledgement naming Boston the vintage bicycle capital of the USA. Because the sorts of bicycles we see here - and take for granted - during our daily travels, are not to be believed. Restored 50-year-old roadsters casually locked up outside office buildings, ancient step-throughs with exotic headbadges and enormous baskets, vintage folders of unknown manufacture used as canine transport - these are just some of the bicycles I see every day as I make my way through the city. Normally, I have no time to stop and photograph even a small fraction of it all, but today the Co-Habitant was with me and a couple of the bikes absolutely required documentation.

Just so you understand, this all-original 1950's Raleigh Sports with front and rear dynamo lights and original white Raleigh grips(!) is actually someone's commuter.

Secured with a U-lock to a bike rack outside a small local university, it looked so natural amidst the mixed crowd of other bikes, including a fully lugged Specialized and a couple of Peugeot mixtes.

The headlight and tail light seemed functional. These must provide sufficient lighting for the owner's commute, as there were no other lights attached to the bike. Anybody know how powerful they are?

But exciting as it was to see the beautiful vintage Raleigh, it paled in comparison to what we stumbled upon next. Yes, that is my Gazelle, Linda, parked next to... another vintage loop-frame Gazelle.

What are the chances? Unlike Raleigh 3-speeds, Gazelle "Oma" bicycles of this vintage were never imported into the USA and were never sold here.

Both my bicycle, and the bicycle next to it, have stickers indicating that they were purchased in Germany (not in the same shop or even the same town). And the (yet another) vintage Gazelle I spotted nearby a year ago, had a Dutch shop sticker on it. The bicycles' owners must have at some point brought them on the plane when moving to Boston, probably for grad school or for post-doctoral positions.

Seeing the other Gazelle and remembering the third one I spotted earlier, made me wonder whether they still belong to the same owners who brought them over from Germany and Holland. Either way, those bikes must have been dearly loved, at least at the time. Transporting a 50lb bicycle on an airplane could not have been easy!

Overall, my Linda was in nicer condition than her neighbour, but one thing that evoked her envy was this mudflap on the other lady. Now she is asking me to get one for her, too. I think a leather one (possibly hand-made?) would go well with her saddle and grips, but I am curious whether these Gazelle proprietary flaps are still sold today. Also, they seem to be attached by a bracket that does not necessitate drilling the fender, but makes use of the existing holes for the stays, which seems like a fairly easy installation method.

I think that to spot several bicycles like this in an American city is highly improbable. Surely it is proof that Boston is the vintage bike capital? If you have a better story about your city, bring it on!